
During this project, we were tasked to create a simple 3 dimensional character out of cubes and spheres. We did this in 3DS Max, and it wasn’t that challenging.
To begin with, I made a 180cm tall cuboid which is the green one, this is how high the average person is and how high the player is in UE4. The 8 segment cuboid next to it helps to divide it up, and show how big each part of the model need to be for example ‘the head is one segment tall’. Using this it helped me create a well proportioned person with realistic limb length compared to the rest of the body.
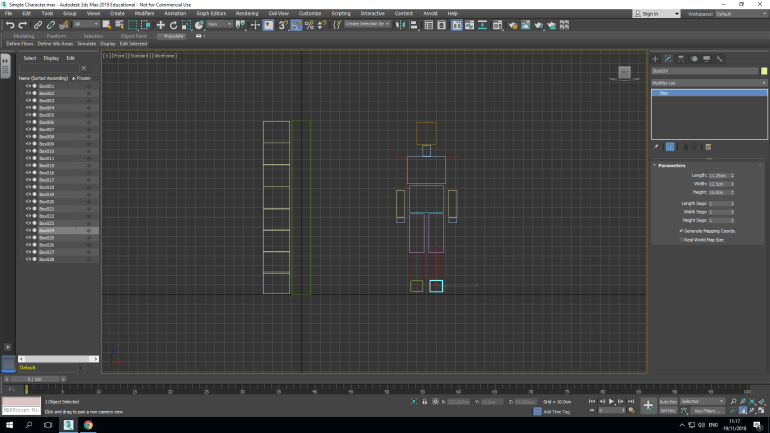
After doing this I had to link up the sections of the Character, to be able to do this I added spheres between the cuboids.
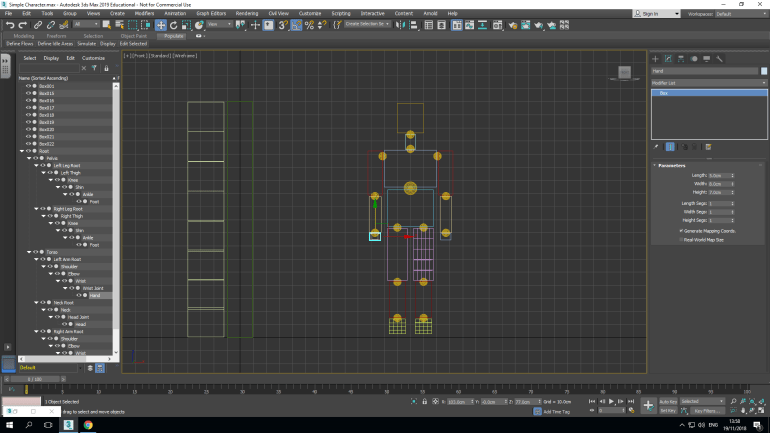
I began with the upper central torso and used the link tool to connect it to the ‘Root’ the central slightly bigger circle. I then connected the right shoulder sphere to the torso and moved outwards, connecting both arms, legs and head. Doing this connected all of the sections together, so for example if I moved the upper right arm the rest of the arm would move with it.
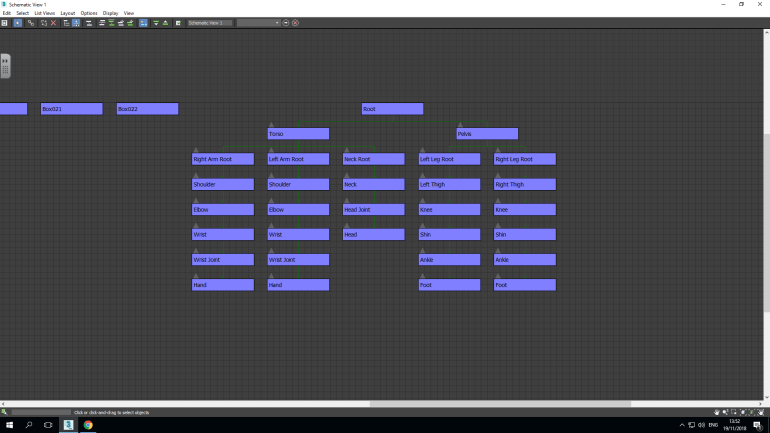
Using this view, I double-checked that everything worked properly and that it was all connected to the right sections. This view also helps you understand how the parts go together because of how it’s laid out.
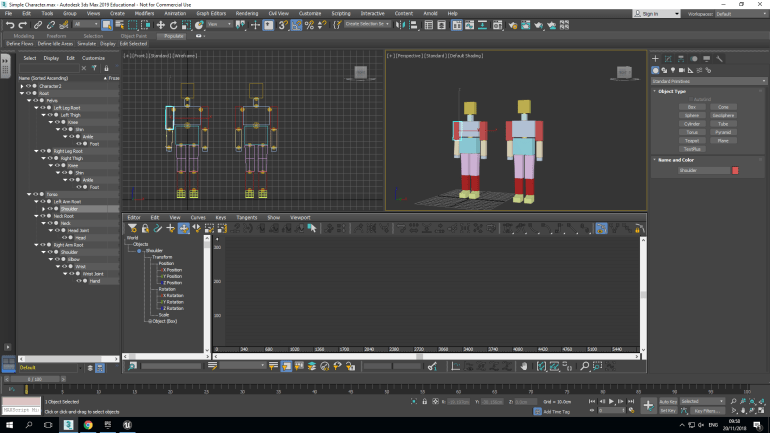
I decided to animate the character with a simple raised arm and waving forward, I did this in the curve editor which opened a timeline with different values and options. I choose the left arm to move and moved the’ Z Rotation’ to -110 and this caused the arm to rise to the correct height.
I moved the wrist now using the same method but set the ‘Z Value’ at -68 and this caused the wrist almost perfectly to become vertical and left it as that because I was happy with it.
The final animated part was the hand a was slightly harder to animate because it moved slightly more then the other components. Once again I choose the ‘Z Value’ and started the animation at value 40 just after the arm had finished moving. I set the value at 20 and then -20 and finally again at 20, this would cause the hand to wave three times at a steady rate. I exported my Character as an FBX File with animations.
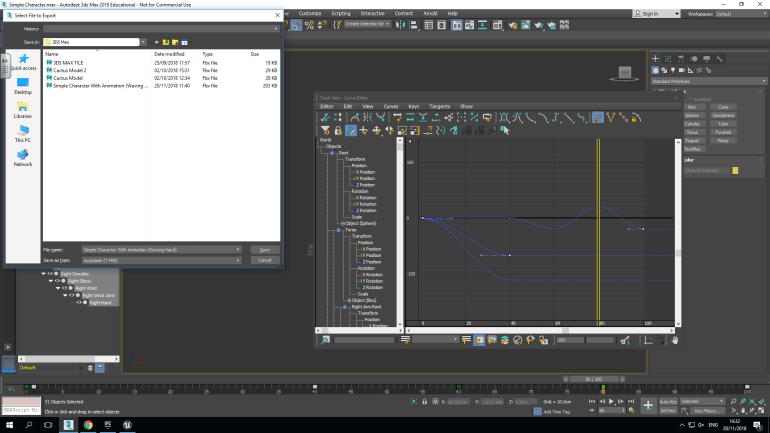
When I exported this, I had to ensure certain things were selected so that it all carried over properly. Animation, Smoothing Groups and Bake Animation were selected.
- Animation ensured that the animation carried over properly.
- Smoothing Groups made sure that any edit I’d done to the actual model was there in UE4.
- Bake Animation controlled the animation and attached it to the model, ensuring that the right animation was connected to the right model.
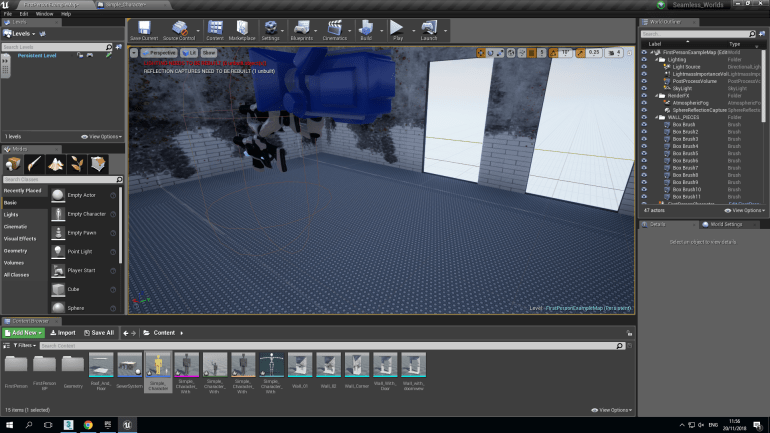
When I imported it into UE4, I saw 4 different parts of the Character
- Skeletal Mesh
- Animation Sequence
- Physics Asset
- Skeleton
Each of these performed a different function that caused the Character to work in UE4.
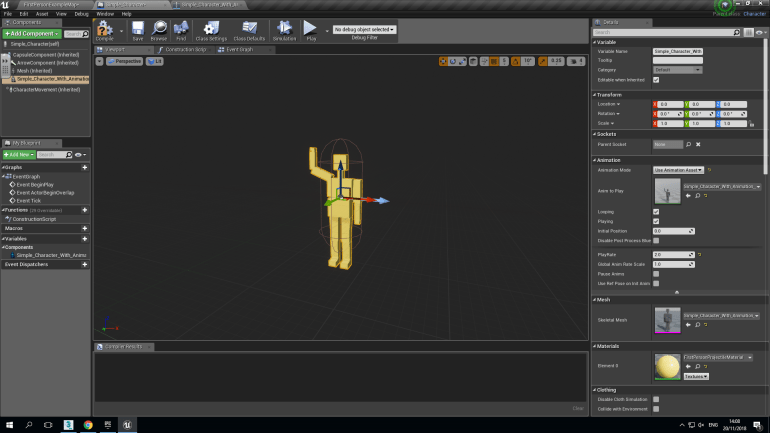
The Skeletal Mesh was what the model actually looked like, I dragged this into a Character Blueprint and because I set it to (0,0,0) in 3DS Max, it was placed completely central in the Editor.
The Animation Sequence was how the Character acted in the Editor and Persistent Level, to insert it I clicked on the animation tab, choose ‘Use Animation Asset’ and selected the one I created.
The Physics Asset causes the Character to have collision on it so things can’t pass through it including the player so this mean that they’re actually realistic.
The Skeleton controls the location of all the different parts of the actual Character this means you can move certain body parts to could cause the Character to sit down if you wanted but would still perform the chosen animation it’s assigned to.
The Animation is inserted, so is the Physics. I then placed this into the Persistent Level and it worked perfectly. You weren’t able to walk through him and his animation worked smoothly.
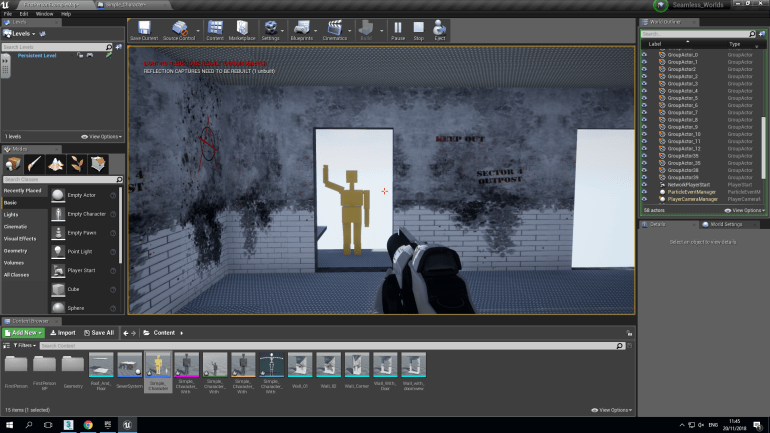
After spending a few minutes in the Persistent Level, it works properly and works smoothly without any issues.
In the future, I would use this method of creating characters to insert enemies into my game with walking and running animations, even so it’s not just used for people, I could animate a tank turret rotating or even plane propellers spinning and use the timeline to create the effect that they’re speeding up.
Eadweard Muybridge’s contribution to animation was very large, he managed to take several photos of a human or animal moving in quick succession, placing these inside an Zoetrope in order allowed him to create an animal or human in constant and realistic motion, this was one of the first animations that was created and even though it’s old it paved the way for more advanced animation. Time was also a large part of his research, somebody doesn’t just leap be in the air and land, the are parts in between. He proved that you can create the movement of a human jumping over a chair, this also allowed film and cinema to advance in realism (mostly animated films) but we wouldn’t of had any of this without Eadweard’s contribution to animation.
Fallout 4 has a character creator that doesn’t follow a stereotype because you can change the proportions of the Character you choose which doesn’t force a stereotype on you. You can change the Weight, Muscle and Height which causes no stereotypes to be created unless you do it yourself. However starting if the male protagonist is slightly taller and more muscly than the female one. Men are usually higher then women in real life and since he is a soldier he would realistically be more muscly than the female one who is a lawyer.
